
Jigsaw Puzzle Strategy: How to Put Together Puzzles Quickly and Easily
It seems easy enough, to figure out how to put together a jigsaw puzzle. Open the box, sort out the pieces, and start putting them in place. Simple, right?
Of course, there are a LOT of things that can help to make doing puzzles a lot more fun and enjoyable. Today I thought it might be fun to share some of my favorite jigsaw puzzle tips for solving puzzles!
When it comes to putting together jigsaw puzzles, you’ll find almost every avid puzzle lover has their own method and a jigsaw puzzle strategy they like to use.
While I don’t think there’s a “right way” or a “wrong way” to learn how to put together a puzzle, there are some things I think that do help make the process all the more fun and enjoyable.
If you are frustrated and the pieces aren’t clicking together and you’ve been staring at puzzle pieces for days on end without much progress – that can ruin a lot of the fun!
Today, I thought I would share my strategy for how to put together a jigsaw puzzle and what I suggest for making it a fun activity for all to enjoy.
Many times when people claim they can’t do puzzles or they don’t enjoy them, I’ve found it’s often just a matter of attempting to do a puzzle that is low quality, too challenging for their level of experience, or simply not having a good technique!
Like All Things, Putting Together Jigsaw Puzzles Gets Easier and More Fun With Practice and Experience
The more puzzles you do, the easier it gets to put them together – especially as you practice more and start to develop techniques that make it a lot easier to put puzzle pieces together.
For most people, it’s best to start with easier puzzles that are somewhere between the 200-500 piece range.
These are good puzzles to begin with, because they often have larger sized pieces and they are not as challenging so don’t require nearly as much patience!
Once you master these easier puzzles, then of course you are ready to start on more challenging puzzles – ones with more intricate design details or a higher piece count.
Fortunately, there are puzzles for almost every skill level and ability out there!


This Crazy Puzzle Lady Has 32 Years of Experience Putting Together Jigsaws
I like to think myself as being “classically trained in the art of jigsaw puzzle solving” by my grandmother and mother, who definitely had their system for solving puzzles down to a science.
I was taught early on at a very young age all of their tips and tricks for getting 2000 pieces of cardboard to all fit together to complete a nice picture.
I spent a lot of time at my grandma’s house as a kid – and my grandma always had a puzzle on her family room dining table!
While there were plenty of kids puzzles with 25-50 pieces for me to do, the real joy for me was to start working on the real puzzles – these were puzzles my grandma often had that would have anywhere from 1,000 to 5,000 teeny tiny pieces.
That love for the “real puzzles” still has not changed – I know it’s just a matter of time of having enough free space before I tackle one of the world’s largest puzzles!
Since I started over 30 years ago, I’ve had a lot of opportunities to do puzzles with many different types of people of all ages and skill level and in a lot of different environments.
This diverse background also helps me understand different ways to complete a puzzle in great depth, because it helps me understand special needs and considerations to make puzzle solving accessible for everyone.
Tools of the Trade: Things That Make Putting Together Puzzles Easier and More Enjoyable
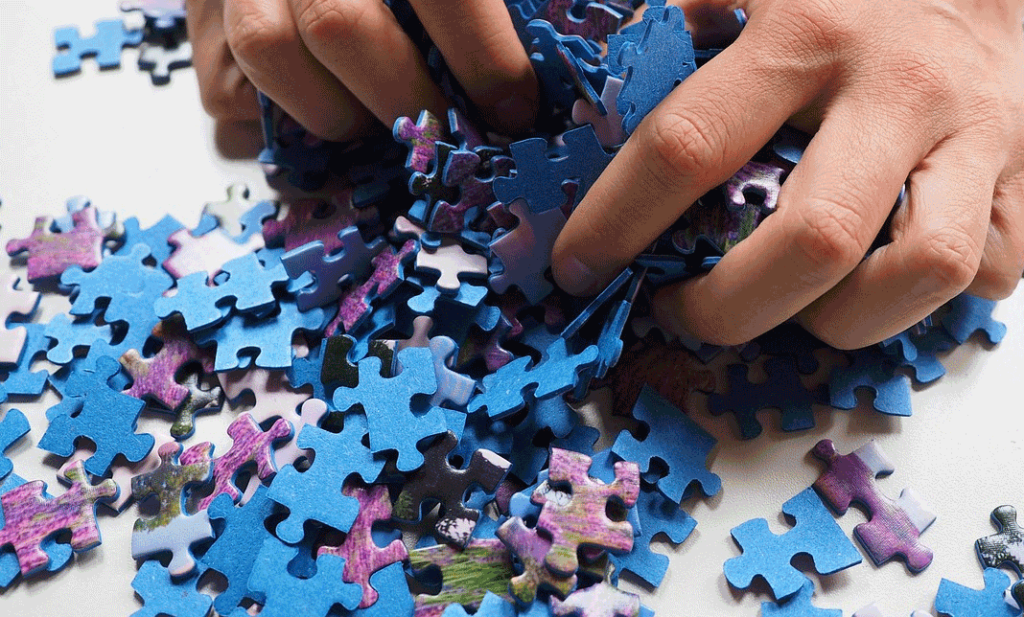
The biggest thing that can make doing puzzles a lot easier is having a good system down for sorting pieces together.
Admittedly, sorting the pieces in the beginning is one of my least favorite tasks – but taking 10 to 15 minutes to do this properly at the beginning makes the puzzle a lot easier and more fun to complete!
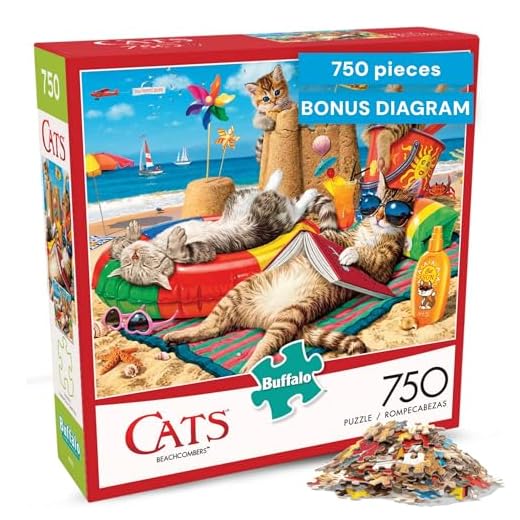
If you do not already have puzzle piece sorting trays, there are a lot of really good options to consider. If you really want to “up your puzzle game”, you will really love the Jigthings Puzzle Sorting Boxes.
When I first started looking into puzzle boxes, my first thought was that these sorting trays from Jigthings were merely glorified – and somewhat pricey – gift boxes. However, the time they have saved me has made a really big difference!
They truly are a high quality chipboard, similar to book binding board – and the way they perfectly stack inside each other, with a lid – makes them perfect to use, especially if you have pets who might try to get into different pieces and sections.

Features
| Binding | Toy |
| Brand | Jigthings |
| Catalog Number List | Catalog Number List Element: G201 |
| EAN | 5060083430106 |
| EAN List | 5060083430106; 5012669002016; 5012269002010 |
| Item Dimensions | Height: 59; Length: 1516; Weight: 220; Width: 1122 |
| Label | Jigthings |
| Manufacturer | Jigthings |
| Manufacturer Minimum Age | 72 |
| Model | G201 |
| MPN | JIG010 |
| Package Dimensions | Height: 213; Length: 1480; Weight: 525; Width: 1087 |
| Package Quantity | 1 |
| Part Number | JIG010 |
| Product Group | Toy |
| Product Type Name | TOYS_AND_GAMES |
| Publisher | Jigthings |
| Studio | Jigthings |
| Title | JIGSAFE - Jigsaw puzzle storage for up to 1,000 loose pieces |
They also have a piece of cardboard that lifts out from the bottom of the box – making these ideal to complete smaller sections at a time and then move them easily to put in place.
These jigthings types of trays really do save a LOT of grief of putting together puzzles!
They also make for a great gift for people who love puzzles, because many people are too stubborn to buy it for themselves – but they will most definitely appreciate it once they start using them!


Of course, if that is not in your budget, you can always go the DIY route and make your own puzzle sorting trays.
We’ve used bowls, plates and gift tins from around the house. It’s not nearly as neat or organized that way but does work for sorting pieces.
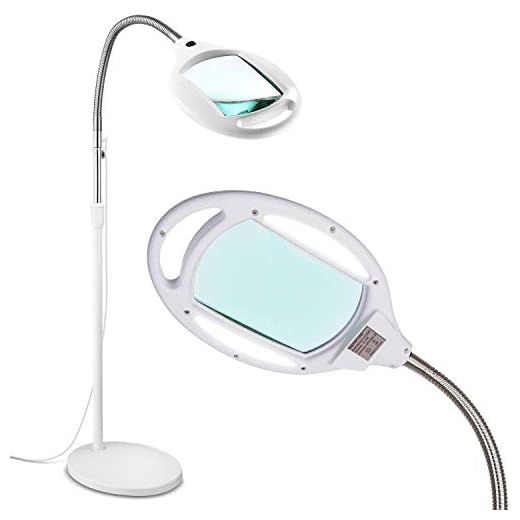
Good Lighting is Also a Must
Another thing that I’ve found is that good lighting is also a must and worthwhile to invest in – not just for doing puzzles but for any type of indoor activity where you might need a good light!


I do the most puzzles in the winter time. We live in the North, which means in winter natural daylight is limited these times of the year. A good puzzle light makes it easy and fun to finish these puzzles without any strain on the eyes.
There are a lot of different puzzle lamps and types of lighting that work well.
I find that non-direct lights with adjustable dimmers and can be bent for different environments are some of the most flexible choices.
I especially like these when working on not so premium quality brand puzzles that may have a lot of glare and shine from lights.
Features
| Brand | Brightech |
| EAN | 0850004456279 |
| EAN List | EAN List Element: 0850004456279 |
| Label | Brightech |
| Manufacturer | Brightech |
| Package Dimensions | Height: 380; Length: 3220; Weight: 2025; Width: 1140 |
| Product Group | Home Improvement |
| Product Type Name | HOME_LIGHTING_ACCESSORY |
| Publisher | Brightech |
| Size | 5 Diopter (2.25x) |
| Studio | Brightech |
| Title | Brightech LightView Pro LED Magnifying Floor Lamp - Daylight Bright Full Spectrum Magnifier Lighted Glass Lens - Height Adjustable Gooseneck Standing Light - For Reading Task Craft Lighting - White |
| UPC | 850004456279 |
| UPC List | UPC List Element: 850004456279 |
I use a daylight gooseneck craft/reading lamp like this full spectrum lamp – this is a great light that makes it very easy to see the details and colors on each piece without too many issues with glare or lighting problems.
Lighting is an often overlooked important factor for doing your puzzles – having the right lights can make a world of difference!
Now that we understand some of the things that makes the work of putting together a puzzle a lot easier and more fun, we are ready to understand the basic strategy of putting together a puzzle.
How to Put Together a Jigsaw Puzzle
There are essentially 6 steps for putting together a jigsaw puzzle – and the most important steps are the ones you do before you even the open the puzzle box!
Choosing the right type of puzzle and having your work space prepared ahead of time can make a big difference not only in your progress, but also how comfortable you are during the process.
Step 1: Choosing the Puzzle to Work On
I know this may seem obvious, but it’s very important that you ensure the type of puzzle you choose is an appropriate difficulty level for every person who will be working on putting it together.
For example, if you haven’t done a puzzle in a few years, you are likely going to be a lot happier with a 300 or 500 piece puzzle to get back in the groove compared to a 2000 or 5000 piece one.
You can always start small and go to more challenging puzzles – but sometimes a puzzle that is too challenging might make you angry or frustrated.
If a puzzle is too hard, it’s OK to give up on it – you can always trade it with someone or sell it and get something a little easier.
There are so many benefits of doing jigsaw puzzles! You shouldn’t give up on puzzles all together just because you don’t like the very complicated ones or ones with too small of pieces!
Another consideration is if you have kids working with you – you definitely want to make sure the brand of the puzzle is one that has pieces that match and lock together well and are a good size for their smaller hands.
Step 2: Preparing Your Work Space
As I mentioned earlier, there are some good tools of the trade to make puzzle solving a lot easier!
Preparing your workspace ahead of time is another extremely important step.
Ideally, the place where you work on the puzzle should not be in a high traffic area – otherwise you risk the possibility of others accidentally knocking pieces over or bumping into the table.

Features
| Binding | Toy |
| Brand | Jigthings |
| EAN | 0793631205547 |
| EAN List | 0793631205547; 5060083430595; 0734548256482; 0783627716843 |
| Item Dimensions | Height: 1007; Length: 1317; Weight: 1200; Width: 155 |
| Label | Jigthings |
| Manufacturer | Jigthings |
| Manufacturer Maximum Age | 600 |
| Manufacturer Minimum Age | 12 |
| Model | JIGTABLE FBA |
| MPN | JIGTABLE FBA |
| Package Dimensions | Height: 670; Length: 3250; Weight: 2989; Width: 2390 |
| Package Quantity | 1 |
| Part Number | JIGTABLE FBA |
| Product Group | Toy |
| Product Type Name | TOYS_AND_GAMES |
| Publisher | Jigthings |
| Studio | Jigthings |
| Title | JIGTABLE - Jigsaw puzzle table from Jigthings. Jigsaw Table |
| UPC | 783627716843 |
| UPC List | 783627716843; 793631205547; 734548256482 |
The table should be smooth and clean if possible. If you don’t have a dedicated puzzle table, it can be a good idea to invest in a jigsaw puzzle board.
A jigsaw mat like this one is another good option to explore, especially if you like to be able to easily transport your puzzles from one room to another.


Choose comfortable chairs for sitting in, or consider getting a puzzle table that can be easily moved and adjusted depending on your needs.
You don’t have to sit in an uncomfortable chair to do a puzzle!
If you plan on gluing the puzzle together after completed, you might want to protect the surface of the table before assembling the pieces.
This can be done either by using foam board or a clear plastic protective table cover that will make sure if any of the puzzle glue drips or leaks it will not damage your work surface.
It’s sometimes also helpful to use a puzzle board or mat – this way pieces will stay put – and if you need to store away the puzzle later it’s easy to move.
Step 3: Pre-sort & Staying Organized
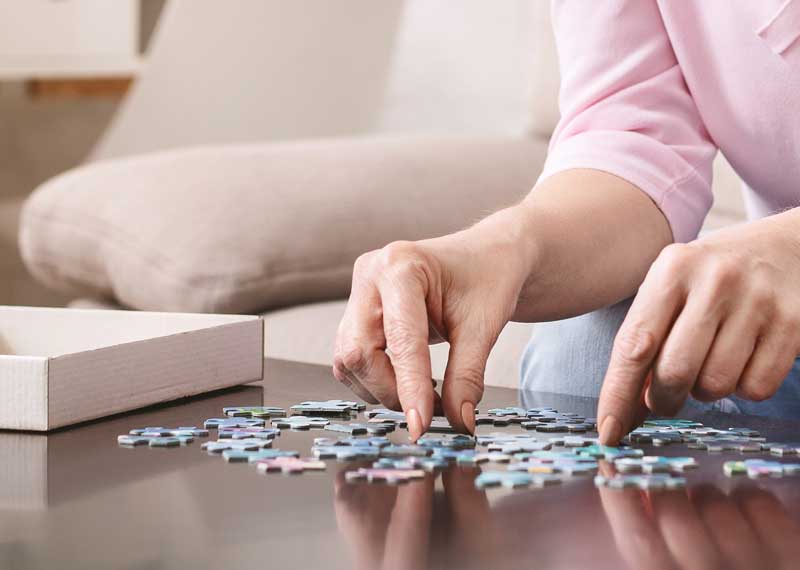
The level of organization required for assembling your puzzle will greatly depend on the number of pieces and the overall difficulty of the puzzle.
Puzzles which have 1000 pieces or more will definitely be much easier to put together if you have some sort of organizational system in place, such as using storage trays to sort by color or section.
One thing we will often do before beginning is look at the picture of the puzzle on the box and identify key areas that will likely stand out as puzzle pieces. These can be contrasting colors or other distinguishing parts of the photo.
Next, we work on flipping all of the pieces right-side up and while doing this, pull out the edge pieces as well as any pieces of interest that may be useful to have later.
While there are various methods for doing this, we’ve found using multiple shallow trays such as these puzzle sorting boxes are a good way to keep all the pieces right-side up without overlap.
Step 5: Putting it Together
Starting with the edge pieces is a common strategy for putting together a puzzle, because this will help give you a good reference for where the other middle pieces will go in relationship to the border of the puzzle.
Working on smaller sections at a time can be helpful as well. If working with several people to assemble a puzzle, designate an area for each person so that when you find a piece that might belong somewhere else, you can toss it their way – it may just be the piece they need to bring it all together!
In general, I tend to work on the “easiest” sections first, as this gives you more progress quickly. Saving the most challenging sections for the end will keep you determined to finish when most of the puzzle is already near completion.
Remember: If you at any time start feeling frustrated or tired – it”s OK to take a break from the puzzle! Simply cover it or let it sit for a little while and come back to it at a later time – it makes a HUGE difference and all of a sudden pieces will start coming together much easier!
Once these easier sections are completed, it starts to become much easier to focus on the more difficult or detailed parts. Often times, the focal point sections make it less challenging to start figuring out where the other pieces might go.
Keep working on it until you’ve completed the major sections of the image, and then start filling in any areas until it’s all put together.
Step 6: Congratulate Yourself When It is Finished!
The most rewarding part of putting together a puzzle is when that last piece snaps into place! Sit back and admire your work!
At this point, if you are planning to glue the puzzle together, you may do so using one of the puzzle glues and directions recommended by the puzzle glue manufacturer.
If you would like to save the puzzle to do again at a later time or to swap with a friend who also loves puzzles, very carefully ensure all pieces are accounted for – check every nook and cranny of the table area and the floor where pieces may drop.
I recommend keeping puzzle pieces in a zip-lock type of plastic bag or plastic case after opening, as the pieces may fall out of a traditional puzzle box when not sealed properly, and tape can lose its stickiness over time or cause damage to the box.
Once you’ve finished this puzzle, you’re ready to enjoy another one! You can choose whether to do another one you have been eyeing up, or maybe even challenge yourself to a more difficult puzzle.


The more you practice putting together puzzles, the more exciting the challenging puzzles become!
What Tips & Tricks Do You Have for Putting Together Jigsaw Puzzles?
Do you have any tips for putting together a jigsaw puzzle you would like to share? We’d love to hear about your jigsaw puzzle strategy and any tips for staying organized in the comments below!


We are working on Farmers Daughter. 1000 pieces. The last tree section we have 27 approximately pieces left and they do not fit anywhere. Has anyone ever experienced this. We just can’t seem to finish it!!!
Suggestions???
Hi Shirley! I definitely understand the frustration! I haven’t tried that particular puzzle yet, but something we usually do is look at the shapes of the puzzle pieces and then also compare to how the colors/shading line up with what would go with them.
Another thing to consider is whether there may be a piece in the wrong place somewhere in the puzzle. We have done this a few times on puzzles where pieces can accidentally fit in the wrong spot – causing all sorts of havoc later down the road as you get closer to finishing it. I hope that these tips will help and that you’ll see your puzzle to completion soon!
I find if you turn the pieces over and look at the back you’ll be able to tell if the pieces go together. I only do that when I’m unsure but it has helped a lot.
I am currently working on a 3000 piece puzzle. 3 times now the border and some of the finished sections have either fallen of three board or my dog has stepped on it. Is it possible to glue the puzzle as in going along?
Hi Kristen,
You definitely could glue it together as you go along, but I’m not sure if that would maybe cause its own set of issues, like the glue not setting, pieces sticking together when you don’t want them to, etc. We have a house of cats & an 80 lb dog who thinks she is a cat so I definitely understand the frustration! If you try gluing as you go along please let me know how it works out for you!
I’m doing a puzzle of Whistler and I’m at least 40% complete but I’m stumped. I do puzzles often and this is the first time I want to quit. The pieces of the puzzle sometimes feel like they go together and then later you realize they don’t. This of course happens but it is happening very frequently. The sections that are left are of large swatches of similar colors and I’m getting frustrated. I will take your tip and further sort the puzzle pieces into even smaller groups than I currently have, but are there any other tips you’d recommend?
Sometimes it can be helpful to sort the pieces by shape, especially when the colors are very similar. Taking short breaks away from it can be helpful too!
So how do people do large patches of totally identical color. It seems impossible
Hi david, it’s usually possible by looking at the shape/style of the puzzle piece instead of the color/image on the piece. Those are much trickier for sure but it is possible!
Love your tips………….these are things I mostly have been doing as well.
I now have a puzzle though that is so “busy” with stuff and colors, that there most pieces could fit into potentially 2-3 different sections, so sorting by broad colors is not really possible since there is no really decisive spot to group them?!?!? Thoughts???
Hi Sandy, when puzzles get hard like that, my next go-to is to organize the pieces by shape/style. So for example, I’ll put all the pieces with 2 heads in one box, 3 heads in another box…looking at the shape of the head and size can make it easier to identify where they might fit. Hope that helps!
Hello.
I am about to embark on a 1000 piece puzzle, The Great Events of the Bible. I have worked puzzles with my niece, but not this many pieces. My thoughts are to have it framed when done. I recognize the importance of workspace, but am not sure what would be the best option. I may not ever work another puzzle after this, so do not want to invest a lot of money in something not used again, but want something that would be comfortable, portable (move from one room to another), economical . What do you recommend?
Hi Walker, I’d recommend something simple like a folding card table – most can be found for under $20 and are always useful for other things as well. Hope that helps!
Great tips!! Have LOVED doing multiple puzzles during COVID. I am working on my first solve-the-mystery type puzzle, so there is NO picture of the finished puzzle to use as a guide. I need help! Any tips for doing a puzzle that has NO picture?? Thanks!
Hi Leigh, doing a puzzle without a picture is challenging but still possible. Is there enough variation in the colors to sort by color/pattern on the pieces? From there I would start with the edges and try to find colors that match the edges. Sounds like a super challenging puzzle and I hope you have fun with it!
I haven’t done a puzzle in decades and thought being in quarantine would be a great time to do a 500 piece puzzle. Your tips will give me a good start so I am looking forward to seeing how I do. This puzzle has the letters on the back which I plan to ignore unless it came partially assembled. Of course, I will take it completely apart. Wish me luck!
Hello. I have a 1000-puzzle with mini-sized pieces. The pieces are coded on the back (A-E). I can’t figure out if coding is by quadrant? Section? Rows? The A, B, C, etc. doesn’t correspond with the picture in a way that makes sense. Any ideas? Thanks
I just completed a 500 piece that had some really abnormal pieces, hooks, pieces tad had curved pieces. Pieces they erre horizontal, or vertical. In separating I had a section for regular shaped. The dome looked like a fuck, orca fog head, or angles. Even ones with a flat top or side. It was a mess.